My room mate (Trent - I talk about him enough, I might as well put a name to him.. lol) was admiring one of my pieces of work last night and was telling me that when I try to sell them online, I need to really specify that the beads are coloured 'all the way through' and won't go bad a few days after wearing. He said "I would pick that up and think: its pretty.. but the colour would fade after wearing it once in the shower. And walk away" and I said to him "But obviously, you wouldn't wear that in the shower!" But that has got me thinking... Is it obvious?
As the majority of my creations are beadwoven, I would not personally wear anything I make in the shower, because it might weaken the thread or the colour MIGHT get ruined, I don't know and personally I don't want to risk it.. But is it really that obvious to everyone else? Will I need to consider putting 'Caring for your Jewellery:' tags on each of my pieces? Will these tags put people off buying the items because they think "If they need to put that there, then the piece must be prone to breaking easy!"?
This is a question I am going to be hounding the gals at BD later, but it is something I thought I would share (while bored at work..)
Food for thought my darlings...
Emma
xXx
Wednesday 22 February 2012
Sunday 19 February 2012
St Patricks Day
I was doing something the other day and someone mentioned/I read something about St Patrick's Day coming up soon (don't ask me when it is, I just follow people to the pub) and just then it was like the big flashing lightbulb went up over my head 'DING!' and I thought to myself that THAT was going to be my next project - and hopefully one that I would finish!
I got home and I went onto my beading pattern creator on my laptop and started designs for a 4 leaf clover.. trying to bead a four leaf clover using square stitch was harder than I thought.. it just ended up looking like 4 rectangles put together with a weird tail at the back. So I pushed that one aside and thought I would try my shot at a 3 leaf clover.. it took a few goes but I eventually got it and was REALLY proud of myself and went to show my room mate Trent.. His response "Oh... What is it?" - ladies, don't ask a man for advice on anything =P lol.
Then I pulled out ALL of my colour green delica beads I had, which was alot more than I initally thought, picked 2 colours that I probably wouldn't have chosen before, but I was feeling brave. I was at first going to make a pair of earrings then switched the idea to a barette. I beaded 2 clovers (and 1 dodgy one that ended up being back to front) and lay them on a barette. It looked nice but there was something missing.. I wracked my brain and finally turned to google images for advice and up pops a lucky horse shoe.
So then I retreated back to my bead pattern program and designed a horseshoe, this time using the brick stitch pattern, pulled out my gold beads and beaded a little horseshoe.. I decided after I was finished that it was too thin and without wanting to pull the whole thing apart, I ended up just beading additional beads in each row of the inside of the shoe - which actually worked out quite well because it pulled the edges in nicely.
I decided to attach the whole thing to the barette using a white peyote stitch base to attach everything to. After the base was stitched, I attached that to the base of the barette and layered the horseshoe and the 2 clovers on top and stitched them all together. A quite coat of clear nailpolish to hold its shape and VIOLA! One STUNNING hair barette (if I do say so myself!)


I must say that Ima very pleased with how it turned out.. I think I might end up making the earring too ;) Keep your fingers crossed that more random inspiration pops out of nowhere for me!
Emma
xXx
Friday 17 February 2012
The importance of bead stoppers
As a beadweaver, when starting any piece of work it is a good idea for the first thing you put on your thread is a stop bead. I always do - until today..
I was starting a project in square stitch that was only 19 beads long, so I thought that I would forget about the stopper bead because I didn't want to use one of the same colour beads in my project.. that and I couldn't be bothered to get up and find a stray seed bead to use as a stopper bead (I was comfortable)!
So I strung on the first row and as I was beading the second row I let go of the loose end of beads.. all over the table - smooth move Emma!
I restrung the beads back onto the thread and was about to keep going but I wanted to make sure that I had them in the right order so I lifted the project to my eye level.. and let go of the loose end of beads AGAIN!
I am so used to having a stop bead on the end that it was automatic reaction to assume the beads wouldn't go anywhere, so I lost them not only once, but twice! Luckily for me though it was only a small project so it didn't matter all that much.
When I am doing a beadweaving project, I like to get a larger bead (say a size 8 seed bead if the project is using size 11s) in an obviously different colour and put that on the end of the thread. Using the needle I pass the thread through the bead again - in the same direction, twice to reinforce it. This can then be pulled off after the profect is finished (or after the first few rows if it irritates you like it does me..)
 When stringing, I put a bead stopper onto one end of my string, these look like a little spring with two circles at either end for easy grip. Once closed ont the wire they shouldn't move (see pictured). They cost about $2 from bead shops.
If you don't have one of these however, it is just as easy to find other resources. Another tip I learnt was to get a heavy duty paper clip and pop that onto the end of your wire and viola! A make-shift bead stopper ;)
So as a wise person once said.. "DO AS I SAY, NOT AS I DO!" - if you want to get as irritated as I do then go ahead and skip adding a stop bead to your work! Have fun!
Emma
xXx
I was starting a project in square stitch that was only 19 beads long, so I thought that I would forget about the stopper bead because I didn't want to use one of the same colour beads in my project.. that and I couldn't be bothered to get up and find a stray seed bead to use as a stopper bead (I was comfortable)!
So I strung on the first row and as I was beading the second row I let go of the loose end of beads.. all over the table - smooth move Emma!
I restrung the beads back onto the thread and was about to keep going but I wanted to make sure that I had them in the right order so I lifted the project to my eye level.. and let go of the loose end of beads AGAIN!
I am so used to having a stop bead on the end that it was automatic reaction to assume the beads wouldn't go anywhere, so I lost them not only once, but twice! Luckily for me though it was only a small project so it didn't matter all that much.
When I am doing a beadweaving project, I like to get a larger bead (say a size 8 seed bead if the project is using size 11s) in an obviously different colour and put that on the end of the thread. Using the needle I pass the thread through the bead again - in the same direction, twice to reinforce it. This can then be pulled off after the profect is finished (or after the first few rows if it irritates you like it does me..)
If you don't have one of these however, it is just as easy to find other resources. Another tip I learnt was to get a heavy duty paper clip and pop that onto the end of your wire and viola! A make-shift bead stopper ;)
So as a wise person once said.. "DO AS I SAY, NOT AS I DO!" - if you want to get as irritated as I do then go ahead and skip adding a stop bead to your work! Have fun!
Emma
xXx
Monday 13 February 2012
Valentines Day
Ah yes.. That precious time of year where society and hopelessly in love couples get raughted by florists, chocolateirs and greeting card companies..
Apologies for my bitterness (single on Valentine's Day *sigh* need I say more?) NOPE! This year, ima be my own Valentines XD Ima buy myself a box of chocolates on my way home from work, light some candles in the bathroom and have a bubblebath - coz that's how I roll! I don't need a man on Valentines day! What good are they anyways? ;) lol.
My bitterness aside, give that loved one something special this Valentine's Day. I'm giving 10% off selected necklaces and accessories! Find all you need at my online shop here:
http://www.madeit.com.au/storecatalog.asp?userid=37468
While I am here I might as well say to all HAPPY VALENTINES DAY!
Emma
xXx

Friday 10 February 2012
A girl can dream..
I was on my way back from one of my friends places this afternoon, driving through the city, bout 15 minutes from home, in no hurry and there it was looming in front of me just as I got to Tempe.. the gigantic blue building with the bright yellow sign:

There were, I think 9 drawers and halfway down, the drawers doubles in depth
*Add this to wish list*

 These bookcases come in different colours: white, red, chocolate, green.. They are awesome!!!
IKEA
Having that I have never been to Ikea before I thought, I have some spare time.. Ima might go and check it out.. BAD EMMA!!! BAD IDEA!!!

Omg! It was unbelievable (and incredibly dangerous for my wallet)! I now know EXACTLY what I need to get my bead room organised!
<===== There were these drawers that are just a few centimetres deep that would be perfect for loose beads.. Just put in some little square trays to seperate my beads.
There were, I think 9 drawers and halfway down, the drawers doubles in depth
*Add this to wish list*

This one was a giant bookcase that just consisted of =====>
open cubes (They came in different sizes *see below* - this one being 167cm x 167cm) and you can by all of these additional boxes, drawers, cupboards, racks and mix and match the different additions for your own needs.
This would be an amazing way for me to have like, my magazines, my boxes of thread, my boxes of tools!!!
*add to wish list*
 These bookcases come in different colours: white, red, chocolate, green.. They are awesome!!!
<===== This is the same bookcase but in the smaller size.. and example of the different coloured additionals that you can mix and match for your own aquired taste =)
*add to wish list*
I was wandering around the showroom nearly crying because of all the fabulous things that I could have gotten, my wallet was screaming at me, the other things were screaming "BUY ME! BUY ME!"
I resisted in buying a lamp for $5.00 and a rack for my room for $10.00.. then made my way out of the showroom downstairs to the warehouse and ended up calling my mum: "MUM! I'm in Ikea!" Mum: "Oh God, Emma. Put down the wallet!" I resisted the temptation to buy things.. but I think that Ima take my room mate there tomorrow (He's gonna be mad at me when he finds out I went without him.. lol) that way I can have the whole day to look around properly ;)
WISH ME LUCK!
Emma
xXx
Tuesday 7 February 2012
Chin Stroking material
Reading up on posts and blogs and other assorted pieces of paper that are created to inform me the "Best tips and tricks for selling online" has made me start to question my own 'shop' that I have on madeit.com..
Predicament #1:
Alot of the - lets call them articles for time saving sake - have said that a successful tip is to update your store often so that you will keep appearing into the 'recently added' section of the site. At this current stage, I am not making enough items quickly enough to come under the classification of 'updating often'.. Actually, lets be quite frank, I haven't updated the stall at all (maybe twice, I think).
I have also been informed that it is important to not upload all of your items at once, but do them slowly so that when the 'recently added' page rolls over, you will still be featured amongst the other artists but won't have every single addition be yours! A good stall will start selling when you have a few pages that people can browse through ie. 100 items *gasp*
Aside from my lack of motivation, which has thankfully returned-ish, I am finding that another one of my main issues is lack of funds.. I have PLENTY of beads at home, don't get me wrong, but not enough quantities of each particular bead to create something. Which is getting incredibly frustrating as this means that my box of UFOs is forever growing because of said lack of quantities *SIGH!*
Predicament #2:
Advertising... Now I have a facebook page and when I first started my madeit.com page, I was forever posting "Hey! Check out my page! Blah blah blah" And I would get the occasional friend *like* the shared post, but whether any of them actually went online and had a look is totally another question.. And I don;t exactly have any other means of advertising.. apart from my loyal readers here of course ;)
Of all the things I have made.. I think only 3 things I have actually made for myself to wear.. I think I need to start beading myself something so that I can wear them out and people can ask "I love that! Where did you get it?" I can then gush on about how "I made it myself" and hand them a business card (now that I actually carry them in my bag now.. you never know!
Your brains are probably bleeding by now, threatening stroke, BUT IM NEARLY FINISHED MY RANT!!!
Predicament #3:
This is probably my biggest predicament and one that I have been umming and ahhing about for a few weeks now.. Who on this site has actually heard of madeit.com? And then on the other hand, who has heard of etsy.com?
Madeit.com is pretty much the Australian version of Etsy but not as well known.. The reason I chose madeit over etsy is because while it may not be as well known, not very many people make the sorts of jewelley that I make, so the compitition is not as tough.. but on the other hand, Etsy is more well known (lets face it, EVERYONE knows etsy) but the compitition is incredibly tough! This is sort of my catch 22 situation.. and I'm not sure whether I should shut down my site and give etsy a go or whether I should keep going with madeit.com and play my cards with them..
Decisions, decisions...
Well, I know one thing is for sure.. My items on madeit.com are only able to be listed for a certain number of days - those days of which have mostly been used and the majority of my items will be expiring on the site.. When they do, I am not going to upload them back on straight away.. even if my page needs to sit in silence, Ima start to buckle down and get some things made!!! Then when I have enough stock to post an impressive page, slooooowly upload them to either shop A or shop B (whenever I deceide what to do) This in turn will solve my predicaments 1 & 2..
End of rant!
Emma
xXx
Saturday 4 February 2012
My awesome friend!
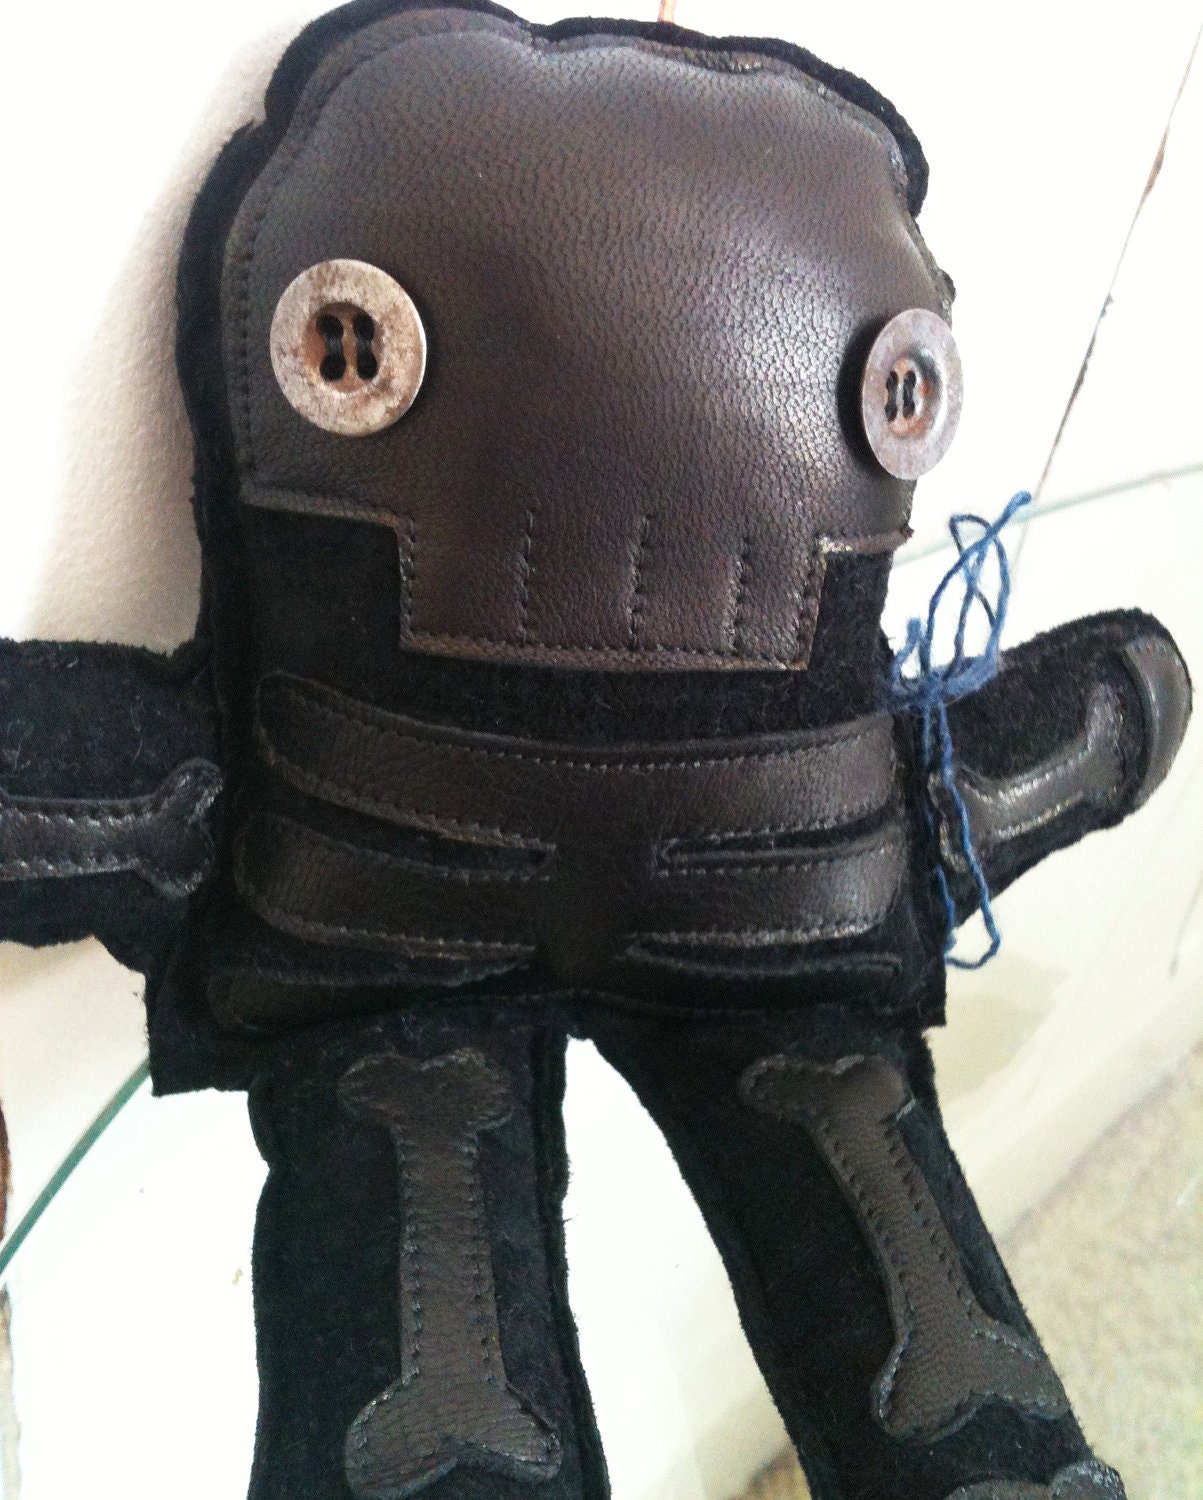
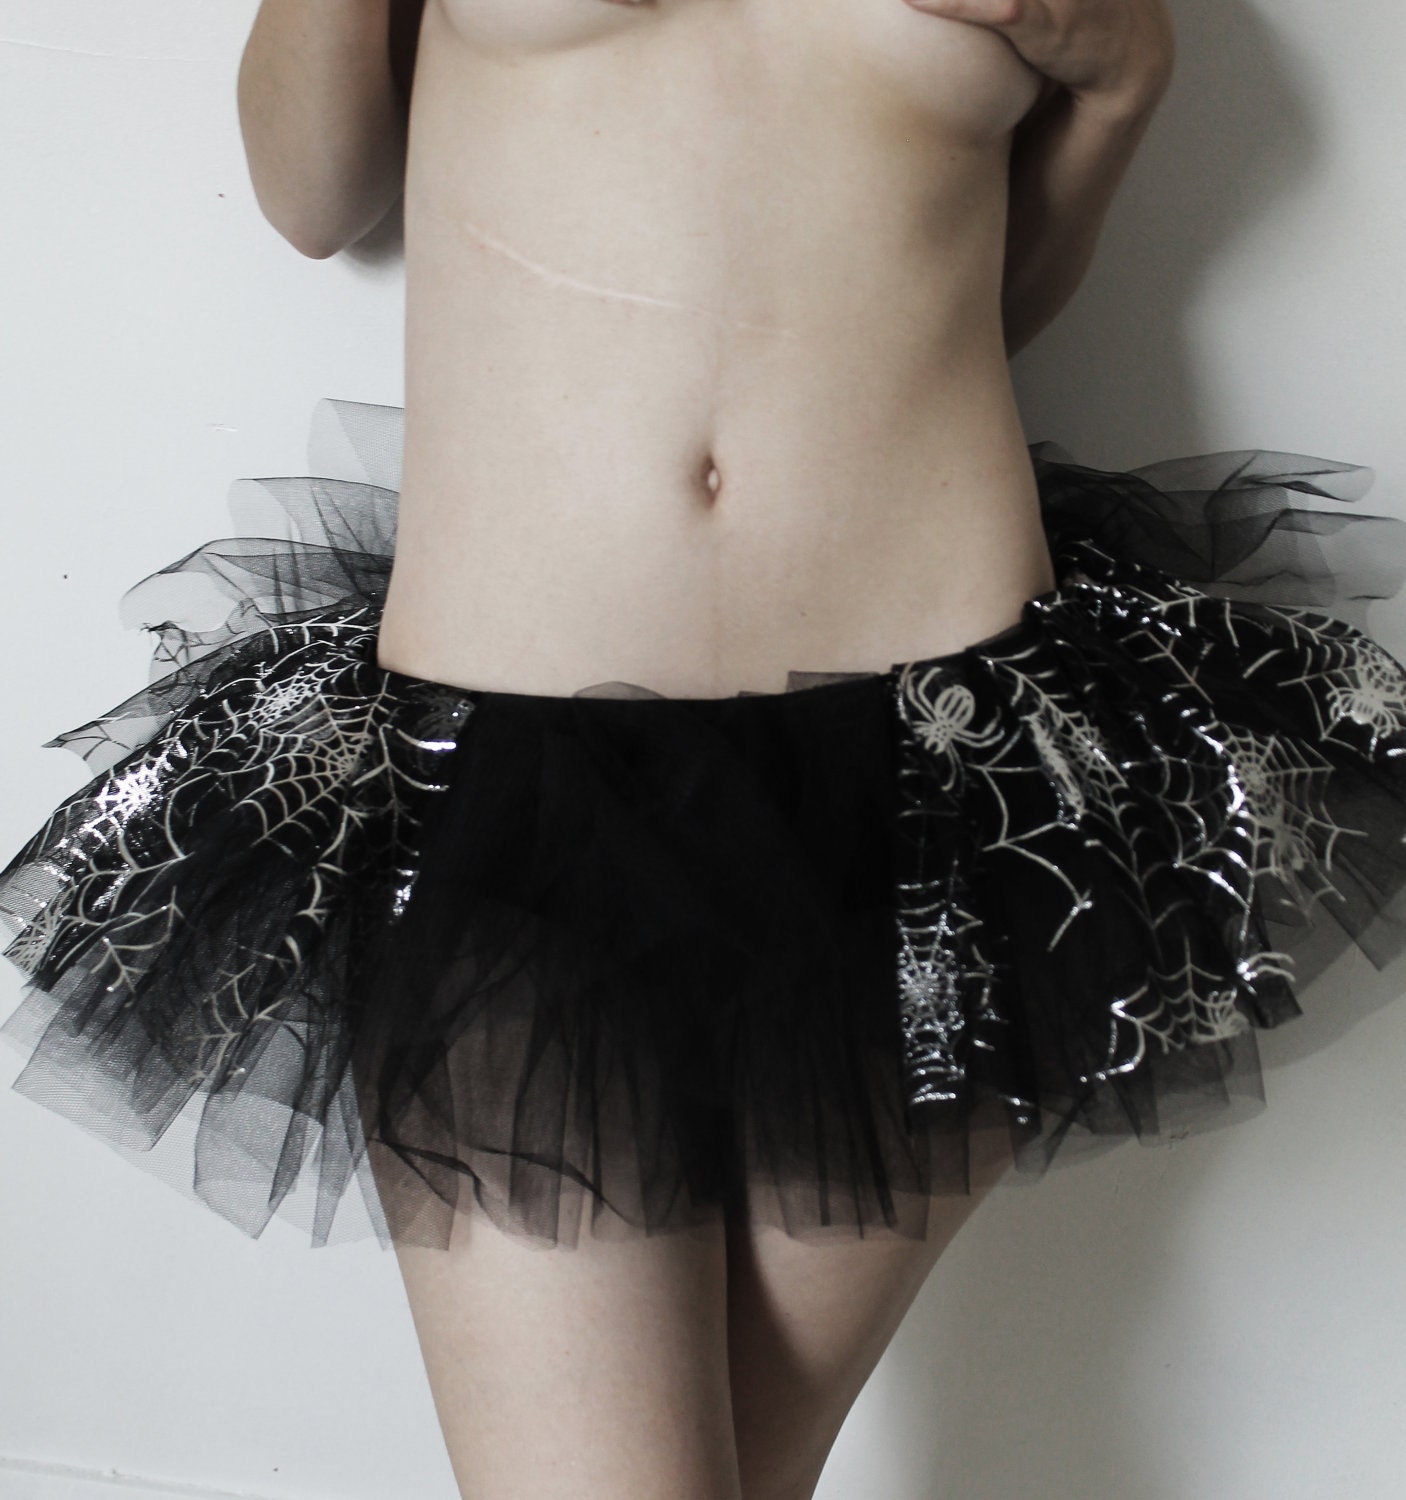
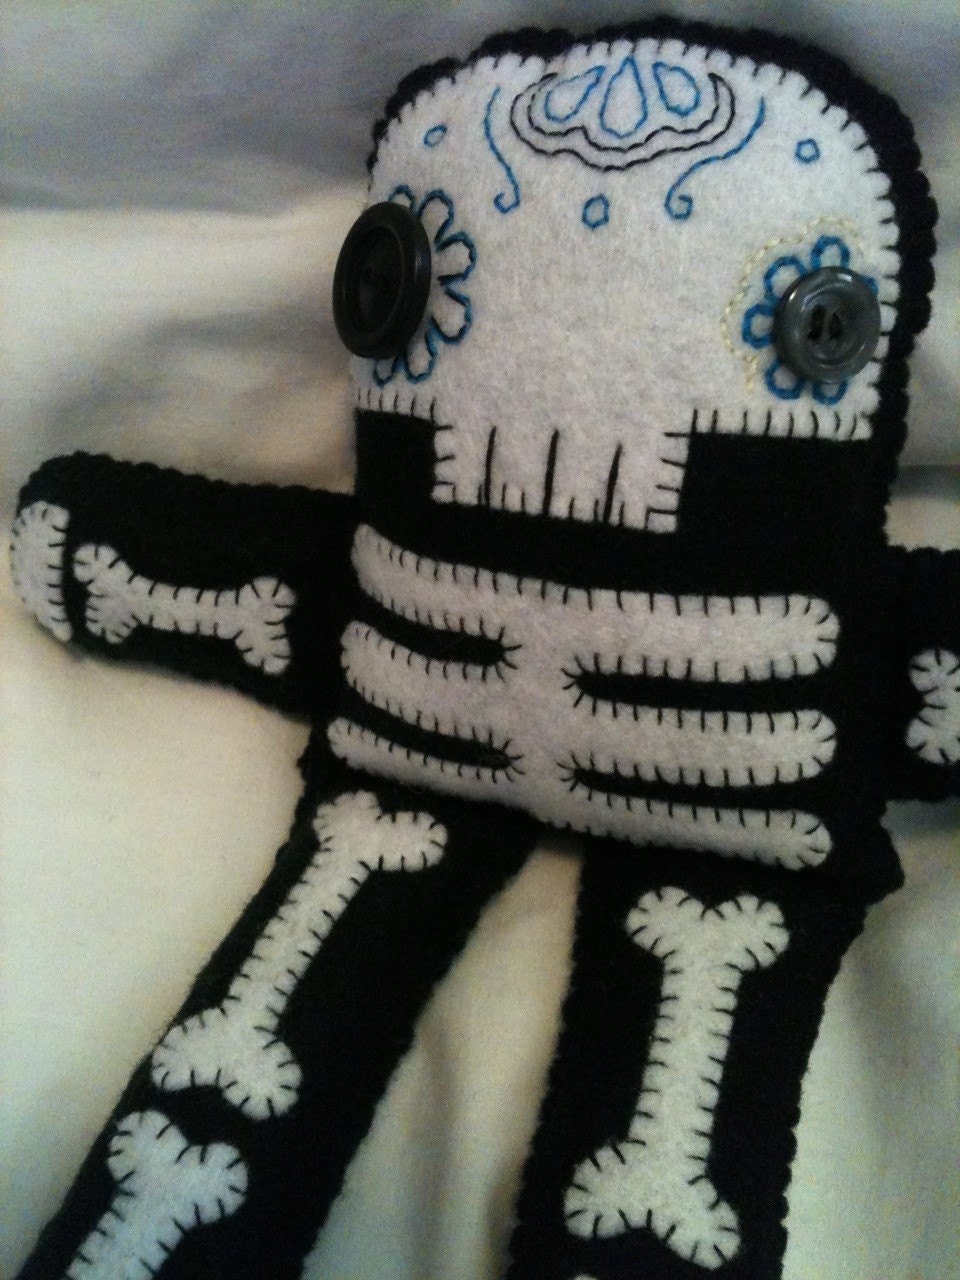
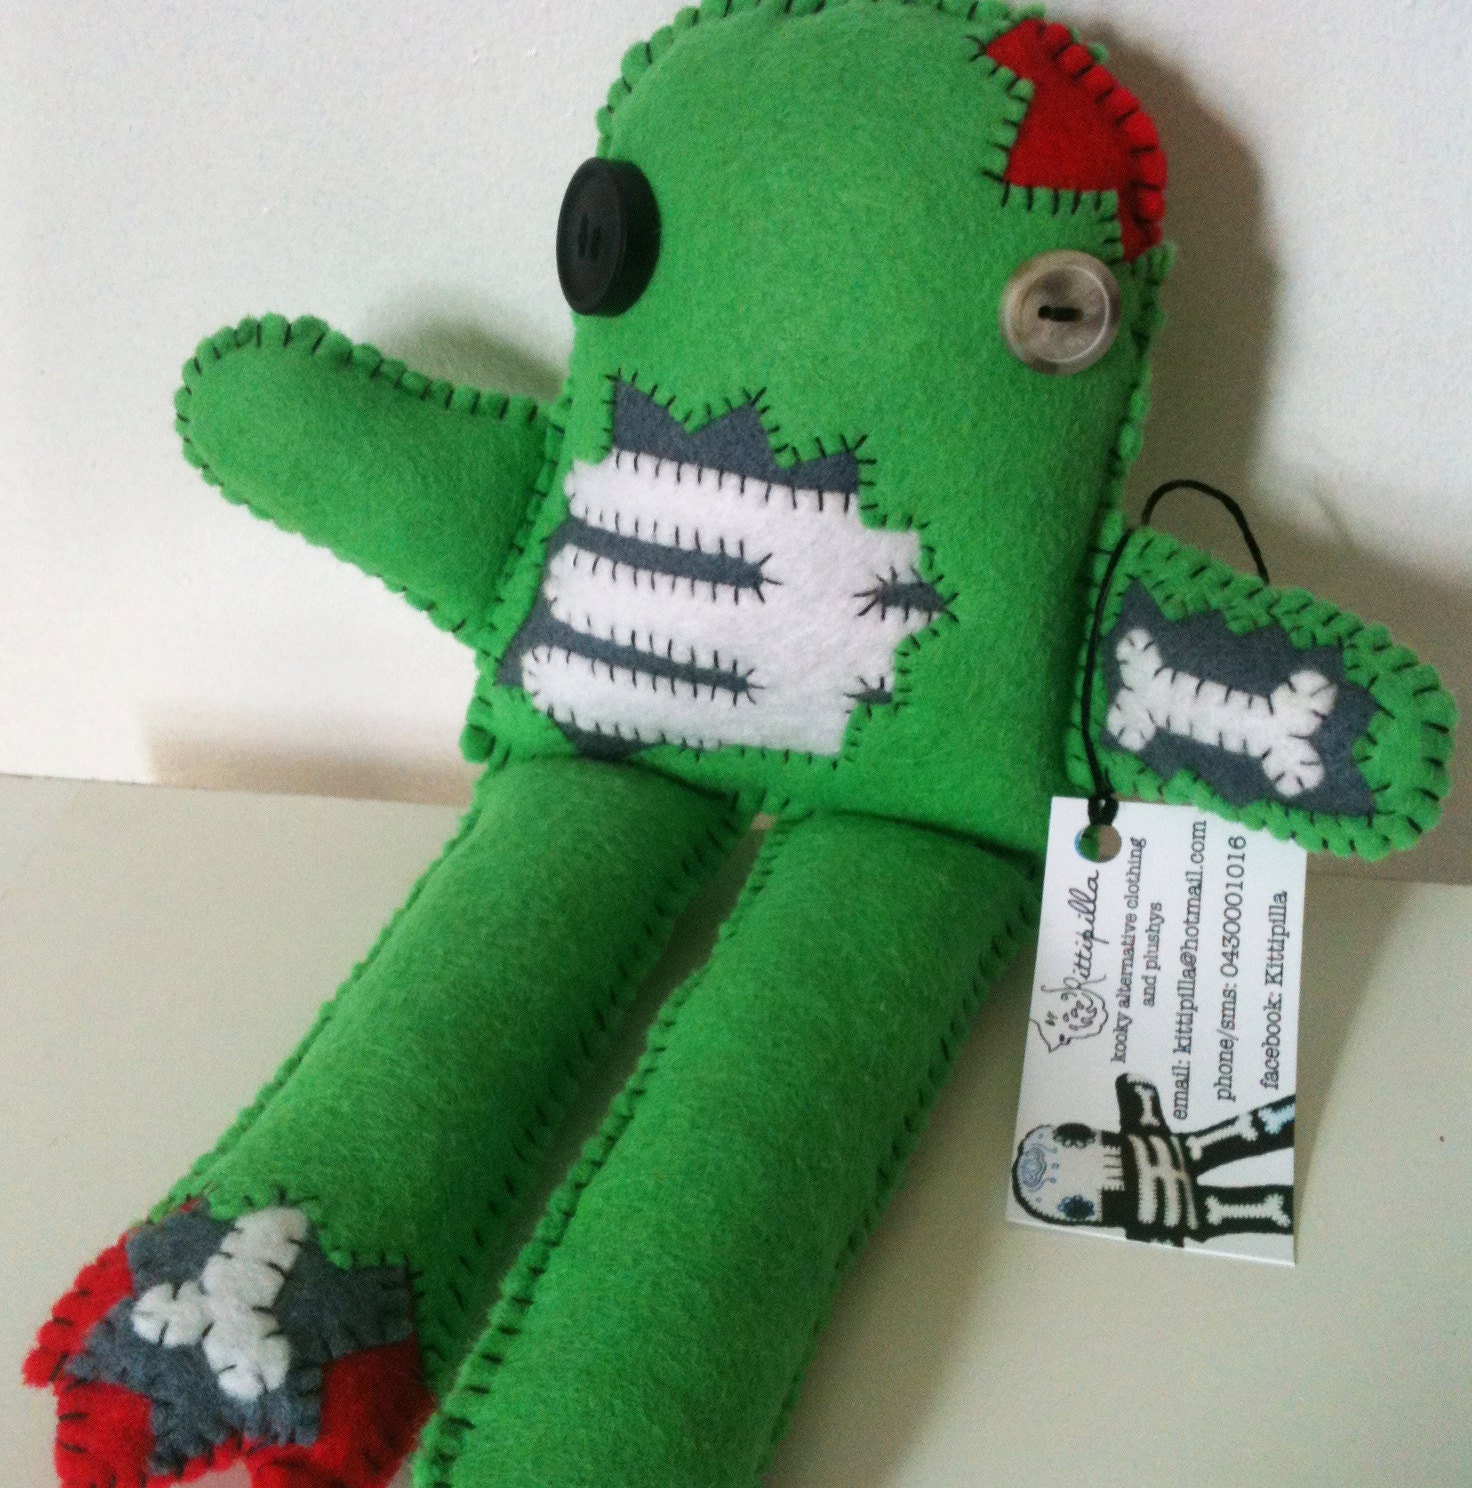
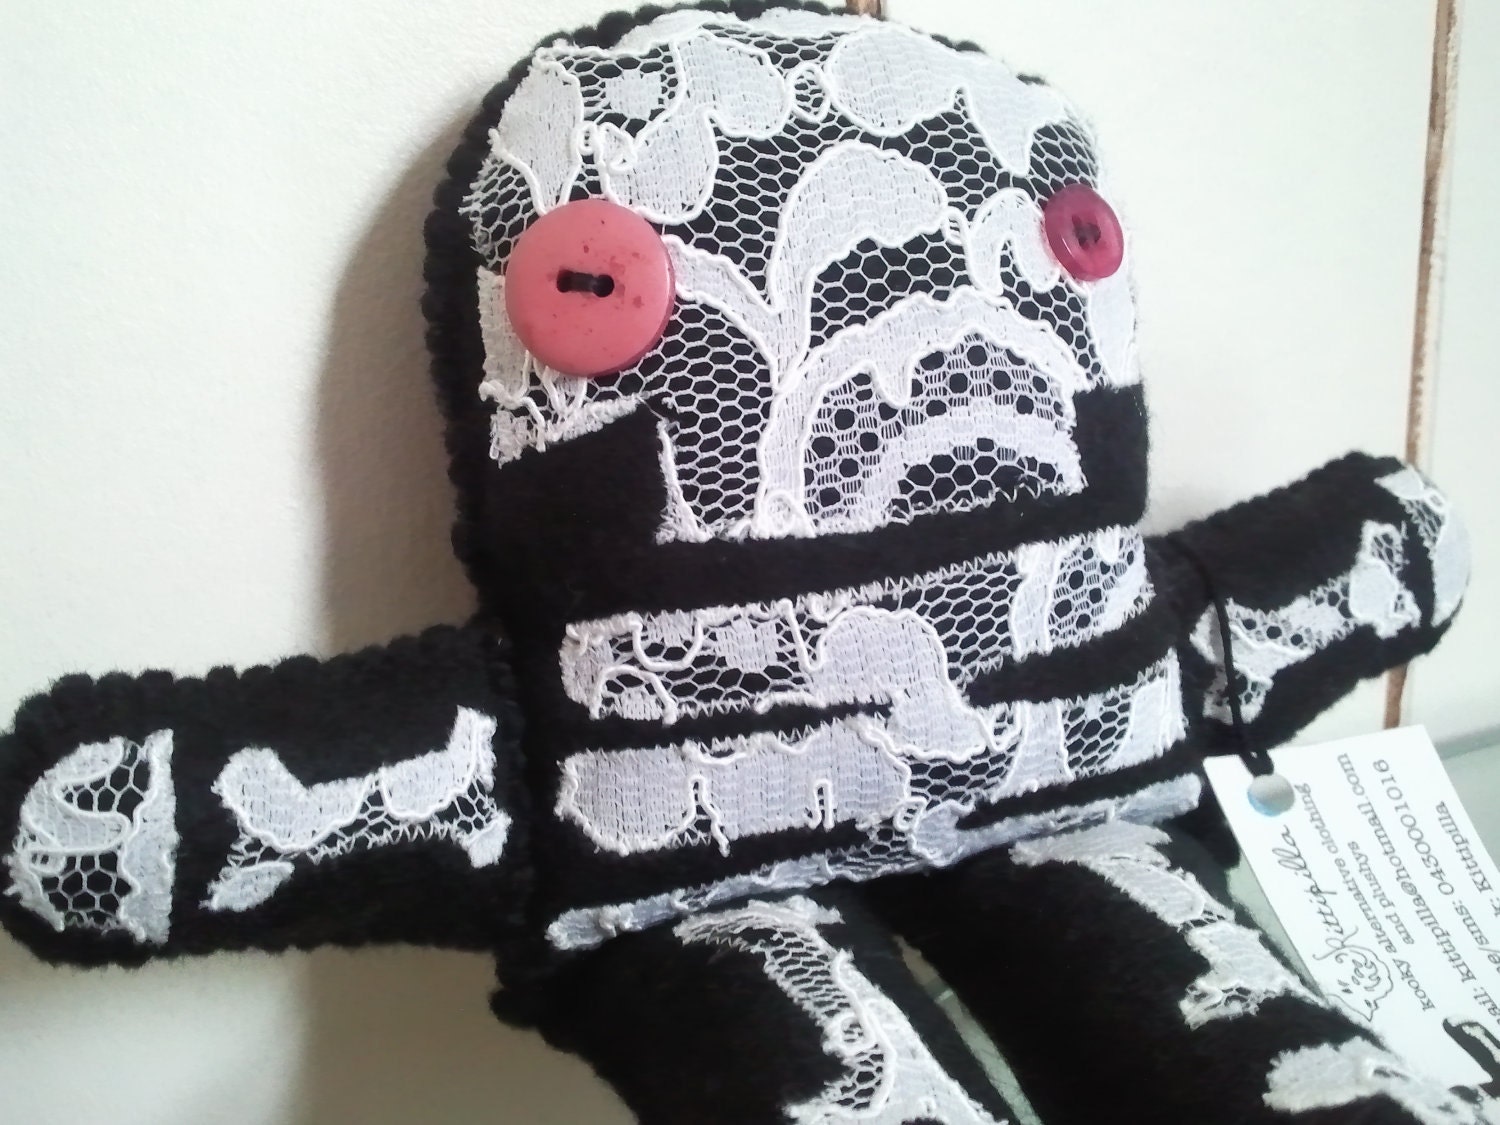
One of my GORGEOUS girlfriends Kittie is starting up her own clothing line, 'Kittipilla'. She is awesome, she makes these adorable little hand-made plushies and also handmade alternative clothing items.
Here are some of the stunning creations she has on her Etsy page:


http://www.etsy.com/shop/kittipilla?&utm_source=Facebook&utm_medium=App_Seller&utm_content=shops&utm_campaign=fb_seller_shop
The piccys chucked a bit of wobbly when I tried to arrange them! lol. Anyways who guys shouls check out her page and definately 'like' it.. You never know, one of these cute plushies may make an awesome present for a sister/daughter/cousin/niece/etc :P
Be Kind!
Emma
xXx
Here are some of the stunning creations she has on her Etsy page:
The piccys chucked a bit of wobbly when I tried to arrange them! lol. Anyways who guys shouls check out her page and definately 'like' it.. You never know, one of these cute plushies may make an awesome present for a sister/daughter/cousin/niece/etc :P
Be Kind!
Emma
xXx
Friday 3 February 2012
Le Kumihimo
Ima attempting that Kumihimo beaded rope (just like i said I would =D haha) and its not going too bad at the moment..
After questioning which cord/thread to use, and after posting my query about said matter on BD, I decided to use Silamide as the base thread. I am also using Delica beads - transparent brown (DB769) and rainbow luster blue (DB167) - a strange combination, I know but I am hoping I can pull it off ;)
It was a little difficult at first, trying to do the first couple of rows without adding beads because the thread kept slipping as I was trying to start it. The first few rows of adding beads was also a little fiddly (and looking at my rope so far, I can see quite a few mishaps) but now I am getting the hang of it!

I had to use paddlepop sticks and stickers to wrap the ends of the thread and secure them, because I didn't have any bobbins (add THEM to my endless shopping list). The pattern of the rope that I was doing is not what the picture said it would turn out like.. I must have made a mistake somewhere when setting up the threads, because now instead of the 2 colours twirling, it has created flowers in the rope.

I am really pleased with the way that the rope is turning out so far.. cept for the few mistakes in the middle there but for a first attemp, I think Ima doing pretty damn well! =D yay!
I have some GORGEOUS blue lace agate beads that I am thinkng of adding as a pendant to the necklace.. I will probably cab one of the larger beads (as I usually do) and hang it from a bail.
Thanks for having a goosey, and I will post the finished product up as soon as it is finished!!
Emma
xXx
Wednesday 1 February 2012
A slight lift
I received an email confirmation from Anne at BD, confirming my partner for the earring swap - that I kinda forgot I entered into - and when I saw the types of things that this person was into, it sent my mind reeling with ideas and inspiration.. It was like the kick start (or in my case, kick up the ass) that I needed to get myself going. So I straight away designed and created the earrings and I love the way that they turned out!
I won't post them here just yet.. I want to wait until she receives them!
Then today I got my Beadwork magazine in the mail and took some others to work with me to flick through, and in one of my B&B mags, I came across a beaded rope done with Kumihimo. I have taught Kumi before to kids when I worked for the bead shop but with really thick cord and without the beads. So I have the technique down pat, I just didn't know how to start adding beads. As a starting reading these 'destructions' it suddenly made sense to me! I understand how to add the beads now!
I am now home from work and uber keen to try and create something with my Kumi disc (which is still sadly, still is its original packaging - unopened and unloved). Thank you Anne and thank you Kumi!
I SHALL RETURN WITH GOODIES!!! - after I tidy my room..
Emma
xXx
Subscribe to:
Posts (Atom)